Ring Group Not Functioning
A Ring Group is a feature that allows you to have multiple phones ring when one extension or number is dialed. It’s a great way for a business to share the distribution of incoming calls among employees.
Tier1 and Tier2

Caution! Before working on this Type of Trouble Ticket contact Tier3 for assistance.
Check User Profiles & Extensions
Procedures – Configure User Profile on the PBX Click Here
Set up Ring Group
Ring Groups are groups of extensions to which calls can be forwarded. They are useful for efficiently distributing calls throughout a business.
To set up a Ring Group
- Log in to Account Manager.
- Click Phone System > Ring Groups.
- To the right, click Create Ring Group.
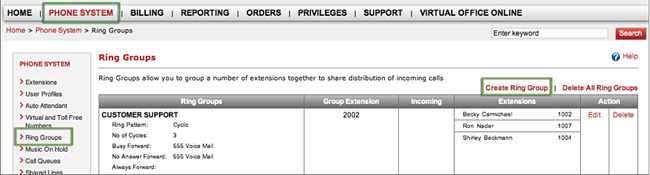
- Enter a name in the Group Name field. You can change this at any time.

- A Ring Group extension will be suggested for you. You can leave it, enter a new number or click on Suggest to get the next available ring group extension number.
- Choose an option from the Ring Pattern drop-down (the different pattern types are explained to the right).
- If you select either of the Cyclic ring patterns, choose the Number of Cycles you prefer before calls are routed to voicemail. (Simultaneous Ring will automatically select 1 cycle.)
- Enter a Voicemail Password for this ring group.
- Select the forwarding destination from the If all lines are busy, forward immediately to drop-down menu. The default is 555 for voicemail; 444 connects to the Auto Attendant.
- Select the forwarding destination from the If the Ring Group cannot answer the call forward the call to drop-down.
- Enter the desired number of seconds before the call is forwarded. Five seconds equals one ring.
- Optional: Select the forwarding destination from the Immediately Forward Calls to drop-down menu.
Note: Setting this feature will override your settings in steps 9, 10, and 11. - Add extensions to the ring group. In order to add additional extensions to the ring group, select an extension from the Phone Extension drop-down menu. Click + to add more extensions and – to remove extensions.

- Click Save to complete.
Set Up Your Virtual Number
Virtual numbers can be programmed to send incoming calls to anywhere in your phone system. For this setup, you will want to point your Virtual Number to your Ring Group.
Point your Virtual Number to your Ring Group.
- Log in to Account Manager.
- From the top menu, click Phone System.
- From the left panel, click Virtual and Toll-Free Numbers.
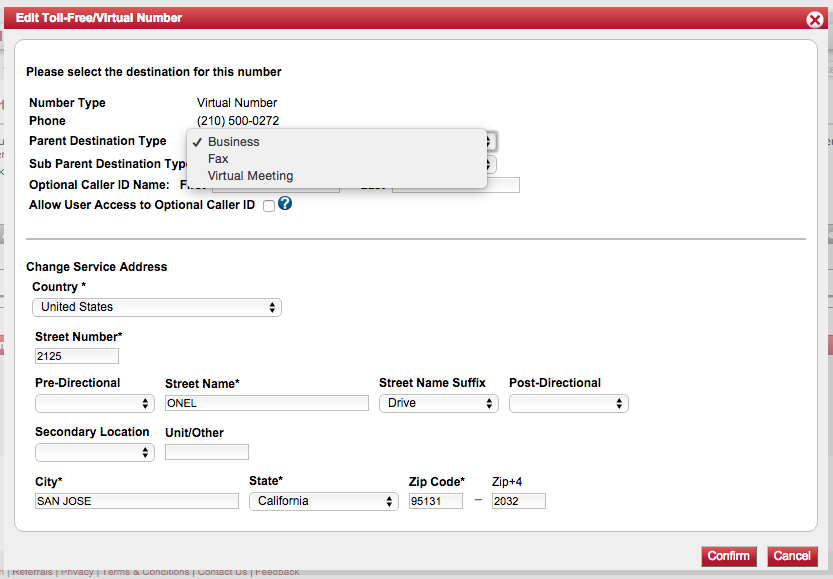
- To the left of the desired number, click Edit.
- From the Parent Destination dropdown, select the destination type you want to associate this number with:
- Business – This will make the number available to assign to any of the following:
- Auto Attendant
- Ring Group (Must be configured first.)
- Voicemail
- Conference Bridge
- Call Queue (Requires subscription to Call Queue service.)
- Individual Extension
- Fax – This will make the number available to assign to a Virtual Fax extension.*
- Virtual Meeting – This will make the number available to assign as a Virtual Meeting dial-in number.*
*Requires Virtual Office Pro
- Business – This will make the number available to assign to any of the following:
- From the Sub Parent Destination Type dropdown, select the service type this number will be associated with (see above).
- Select a final Destination for the number from the dropdown.
- Click Confirm to complete routing your Virtual or Toll-Free Number.