Modem to Bridge Implementation guide- internal document
Resources:
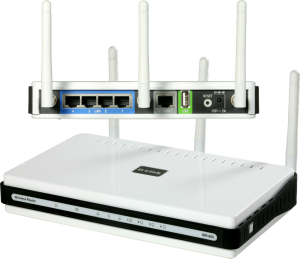
Follow the 8 steps for Bridging D-Link DIR-655 “C” Model.
Step 1: Static IP Address
Gather all the Information you will need to Put into Comm Data and the Modem from the ISP.
- Make MAC Ticket in FreshDesk
- Call to Carrier to Verify IP Address in Comm Data is Correct.
If no Static IP Address is assigned to Client you must Order IP Address and Update Comm Data.
- Have ISP Send Email to support@ceg-solutions.com telling you that the IP Addresses are ready.
- In Comm Data Update Information with Current Assigned IP Addresses from ISP.
Write Down the Following Information IN Comm Data and MACD Ticket
- Default Gateway: ___.___.___.___
- Usable Static IP: ___.___.___.___
- Subnet Mask: ___.___.___.___
- DNS1: 8.8.8.8
- DNS2: 8.8.4.4
- Vender Name ______________________
- Modem Make______________________
- Modem Model _____________________
- Modem MAC ___:___:___:___:___:___
Do not Move to Step Two until Step One is Complete.
Step 2: Appointment & Confirmation:
Set an Appointment with Management at the Location.
- Email and Call Community Manager with Date of the appointment.
- Any Email Appointment and Confirmation will Need to be Sent to our Support Email at support@ceg-solutions.com
- Check this Box when you get the Email of Confirmation from Manager.
- Put appointment date in invite.
Send a MS Office Invite to client and support@ceg-solutions.com for the appointment.
Step 3: Call Everyone:
Call the ISP and the Community CM and have both of them ready to work on the Implementation.
- Get Name of ISP Tech and put it in the MACD Ticket
- Get Cell Number for CM and put that in the ticket (Has to be a cell phone as system will be going up and down during implementation.) If cell phone not in Comm Data, update with most current number.
Step 4: Backup Router
Call Client to Start the Modem to Bridge Implementation Process on the Agreed upon Date in the invite.
- Ask to use the Join.Me (Remote Desktop Application)
- Use the ipconfig command in the cmd.exe on the Remote Computer. (Command Prompt)
- Write Down the Gateway in the ticket
- Navigate to the Router using this Gateway IP Address with Internet Explorer.
- Use the Password for the Particular Community or Company to log onto the Router.
- For Yes Community’s the Password is based on a particular format.
Yes and then the Community’s Property’s Number. (Example Yes0541)
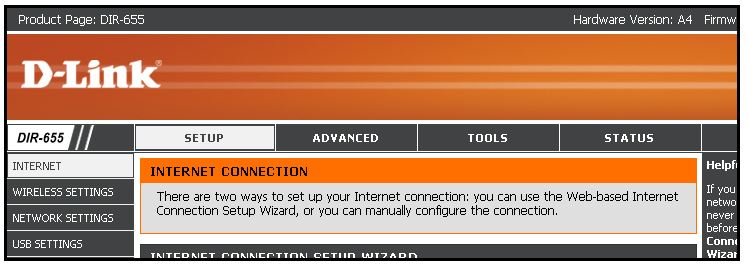
- Click on Tools on the Upper Menu of the D-Link.
- Click on System on the Side Menu.
- Find Save to Local Hard Drive Click on the Button Save Configuration.
- Save the config file to the Desktop.
This will be used if anything Goes Wrong with the process by Navigating to the Desktop and Restoring the Config File.
Step 5: Remove Password
Remove the Password so the client will not require the password if something goes wrong. You will Put it Back After you are Done.
- Click on Tools on the Top Menu.
- Remove the Current Password (leave password field empty)
- Click on the Save Settings and reboot later.
Step 6: Assign a Static IP Address
- Click on the Tools on the Top Menu.
- Click on the Enable Remote Management Box
- In the Remote Admin Port Type in 8081
- Click on the Save Settings
- Click on SETUP
- Click on Manual Internet Connection SETUP
- ON My internet connection is. Choose Static IP
- Fill in IP Address, subnet, gateway and primary and secondary DNS servers.
- Click Save Settings then Click Reboot Now
*As router is rebooting have ISP Tech enable bridge mode or pass-through mode if needed*
Step 7: Confirm Connections:
- Once router has rebooted, confirm VOIP phones, internet and any other connected equipment are online and functional.
Step 8: Set Password
- You can now remote into D-Link by using the static IP Address assigned to router on port 8081.FOR EXAMPLE: xxx.xxx.xxx.xxx:8001
- Click TOOLS
- SET password back to original entry per Comm Data for that location.
- Click save settings
- Click Reboot Now
- Once D-Link is back up. Confirm connections again.
- Update Comm Data equipment tab and update YES DLink C Upgrade Tracking spreadsheet
DIR-655 Emulator for CEG Support Staff
Click on picture to go to emulator for the D-Link 655