These steps are generally intended for reusing Polycom phones with 8×8 service.
You can reuse existing Polycom phones with 8×8 service with a valid device certificate. If you are not sure which model phone the client has, please check the underside of the phone. The model number is listed on the label on the bottom of the phone.
To find the IP Address on the Polycom 550 follow this set of instructions:
- Press the
 button.
 - Press #2 on keypad.
- Press #2 again on keypad.
- Press #1 on keypad.
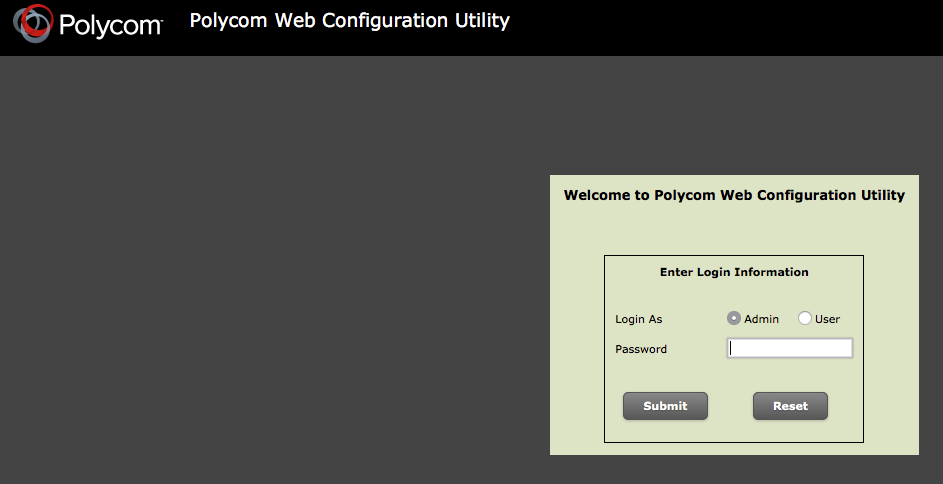
In a browser type in the IP Address of the Polycom Phone and hit Enter on your keyboard.
Place the password in the log in area to log into the GUI.
Resource – Polycom 8X8 Information and Passwords for VoIP Phone Admin Interface
NOTE: This should only be done by a Tier 3 CEG Agent or if given written directives from P. Nearing.
Check for Device Certificate
In order to work with 8×8 phone service, your Polycom phone must have a valid security certificate, also known as a device certificate. Follow these steps to determine whether a valid Device Certificate is installed on your phone.
- On the phone, press the Menu key, and scroll to Status.
- Select Status.
- Next, select Platform.
- Select the Phone option.
- Read the displayed message.
- If the message says Device Certificate: Installed, your phone is supported on 8×8 service.
- If the message says Device Certificate: Not Installed, Device Certificate: Invalid, or if there is no device certificate message at all, then the phone is not supported on 8×8 service.
Configure the 8X8 Phone
After checking the device certificate, you can move on to configuring the phone.
Reset Phone to Factory Defaults Through the Phone’s Web GUI
NOTE: This should only be done by a Tier 3 CEG Agent or if given written directives from P. Nearing.
The device web interface (GUI) allows you make changes to the phone’s settings via a web browser on your computer, which can often be more convenient than on the phone screen itself. You must ensure that:
- The phone is plugged into the network.
- The computer is on the same network as the phone.
- In a web browser on a computer on the same network as the phone, browse to the phone’s IP address.
- Log in as Admin and enter the phone’s MAC password.
- Navigate to Utilities > Phone Backup & Restore.
- Click the small + to open the Global Settings options.
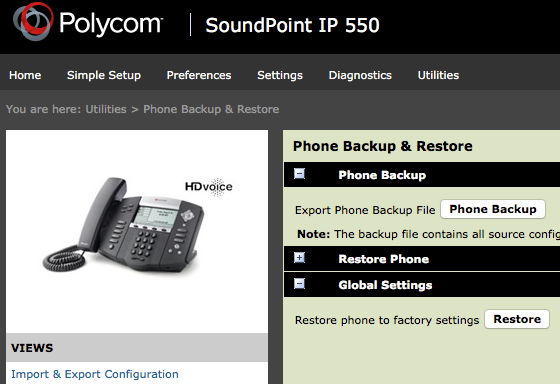
- Click Restore to reset the phone to factory default settings.
- Wait for phone to reboot. Note: After the phone has been reset to factory default settings, the administrator password will have changed to 456.
Manually Provision Phone into Production
- In a web browser on a computer on the same network as the phone, browse to the phone’s IP address.
- Log in as admin and enter the password 456.
- Navigate to Settings > Provisioning Server.
- From the Server Type drop-down, select HTTPS.
- In the Server Address field, enter the 8×8 Polycom Provisioning Server address: pccfg.8×8.com/polycomuc/
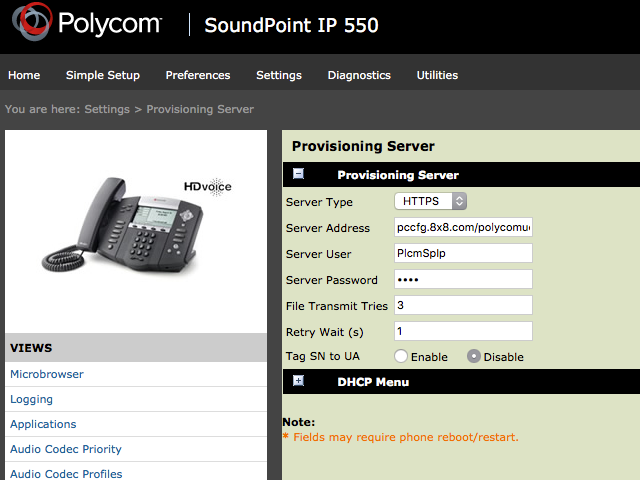
- Click Save.
- Allow several minutes for the phone to reboot and connect to the 8×8 servers. When rebooting is complete, continue on to activate your phone.

Further Resources:
Resource – Join.me – Remote Connection to a Computer
Resource – Polycom 8X8 Information and Passwords for VoIP Phone Admin Interface